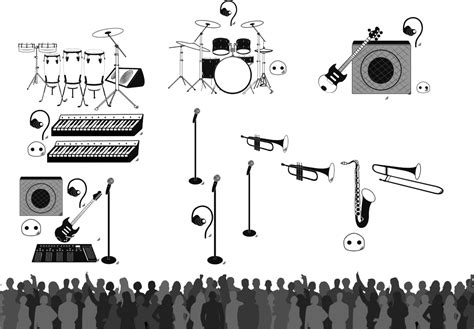
The world of live music is an exciting and dynamic industry, with countless bands and artists taking to the stage every night to entertain and captivate their audiences. However, behind the scenes of every successful live show lies a crucial document that ensures the smooth execution of the performance: the tech rider. In this comprehensive guide, we'll delve into the world of tech riders, exploring what they are, why they're essential, and how to create one that meets your band's unique needs.
What is a Tech Rider?
A tech rider, short for technical rider, is a document that outlines the technical requirements for a live performance. It's a detailed list of the equipment, personnel, and logistical needs that your band requires to deliver a successful show. The tech rider serves as a communication tool between the band, the venue, and the production team, ensuring that everyone is on the same page and that the performance runs smoothly.

Why is a Tech Rider Important?
A well-crafted tech rider is essential for several reasons:
- It ensures that the venue is prepared to meet your band's technical needs, reducing the risk of last-minute issues or cancellations.
- It provides a clear understanding of the equipment and personnel required, helping to avoid miscommunication and misunderstandings.
- It allows the production team to plan and prepare accordingly, ensuring that the show runs smoothly and efficiently.
- It helps to establish a professional reputation for your band, demonstrating your attention to detail and commitment to delivering high-quality performances.
Creating a Tech Rider: A Step-by-Step Guide
Creating a tech rider may seem like a daunting task, but with this step-by-step guide, you'll be well on your way to crafting a comprehensive document that meets your band's unique needs.
Step 1: Gather Information
Before you start creating your tech rider, gather information about your band's technical requirements. This includes:
- Equipment lists: Make a list of all the equipment your band uses, including instruments, amplifiers, drums, keyboards, and any other gear.
- Backline requirements: Specify the backline equipment you require, including drum kits, bass amps, and keyboard rigs.
- Lighting and sound requirements: Outline your lighting and sound needs, including the type of consoles, speakers, and lighting fixtures required.
- Personnel requirements: Specify the personnel you require, including sound and lighting engineers, stagehands, and security personnel.

Step 2: Determine the Format
Your tech rider should be presented in a clear and concise format, making it easy for venues and production teams to understand your requirements. You can use a template or create your own format, but be sure to include the following sections:
- Introduction: A brief introduction to your band and the purpose of the tech rider.
- Equipment list: A detailed list of the equipment you require, including specifications and quantities.
- Backline requirements: A description of the backline equipment you require, including drum kits, bass amps, and keyboard rigs.
- Lighting and sound requirements: A description of your lighting and sound needs, including the type of consoles, speakers, and lighting fixtures required.
- Personnel requirements: A list of the personnel you require, including sound and lighting engineers, stagehands, and security personnel.
- Logistics: A description of any logistical requirements, including load-in and load-out times, parking, and accommodations.
Step 3: Add Visuals and Diagrams
Including visuals and diagrams in your tech rider can help to clarify your requirements and make it easier for venues and production teams to understand your needs. Consider adding:
- Stage plots: A diagram of your stage layout, including the position of each instrument and piece of equipment.
- Lighting plots: A diagram of your lighting layout, including the position of each lighting fixture.
- Sound system diagrams: A diagram of your sound system, including the position of each speaker and console.

Step 4: Review and Revise
Once you've created your tech rider, review and revise it carefully. Ensure that all the information is accurate and up-to-date, and make any necessary changes. It's also a good idea to have your tech rider reviewed by a professional, such as a sound or lighting engineer, to ensure that it meets industry standards.
Best Practices for Working with Venues and Production Teams
When working with venues and production teams, it's essential to maintain a professional and respectful relationship. Here are some best practices to keep in mind:
- Communicate clearly and concisely: Ensure that you communicate your technical requirements clearly and concisely, avoiding any ambiguity or confusion.
- Be flexible: Be prepared to make adjustments to your technical requirements, taking into account the limitations and constraints of the venue and production team.
- Provide advance notice: Provide the venue and production team with advance notice of your technical requirements, allowing them sufficient time to prepare and plan accordingly.
- Offer technical support: Offer technical support and assistance to the venue and production team, helping to ensure that the show runs smoothly and efficiently.
Gallery of Tech Rider Templates


Frequently Asked Questions
What is a tech rider?
+A tech rider is a document that outlines the technical requirements for a live performance.
Why is a tech rider important?
+A tech rider ensures that the venue is prepared to meet your band's technical needs, reducing the risk of last-minute issues or cancellations.
How do I create a tech rider?
+Create a tech rider by gathering information about your band's technical requirements, determining the format, adding visuals and diagrams, and reviewing and revising the document.
In conclusion, a well-crafted tech rider is essential for any band or artist looking to deliver high-quality live performances. By following the steps outlined in this guide, you can create a comprehensive tech rider that meets your band's unique needs and ensures a successful show. Remember to communicate clearly and concisely with venues and production teams, and be prepared to make adjustments to your technical requirements as needed. With a professional and respectful approach, you'll be well on your way to establishing a reputation as a reliable and technically proficient band.
